Integrations
Okta SSO
Enable Single Sign On (SSO) for your organization with Okta.
Setup SSO with Okta
1. Copy the SAML Endpoint URL of Callgoose SQIBS (ACS URL)
Go to Callgoose SQIBS Dasboard → SSO under WORKSPACE category → Select the SAML 2.0 option.
Copy the SAML Endpoint URL of Callgoose SQIBS (ACS URL). You will need this value to configure the Okta settings on their dashboard
2. Configure Okta
- Sign in to your developer-edition Okta org as a user with administrative privileges.
- Go to Applications > Applications in the Admin Console. Click Create App Integration. Select SAML 2.0 in the Sign-in method section. Click Next.
- On the General Settings tab, enter a name for your integration and optionally upload a logo. You can also choose to hide the integration from your end user's Okta dashboard or mobile app. Click Next.

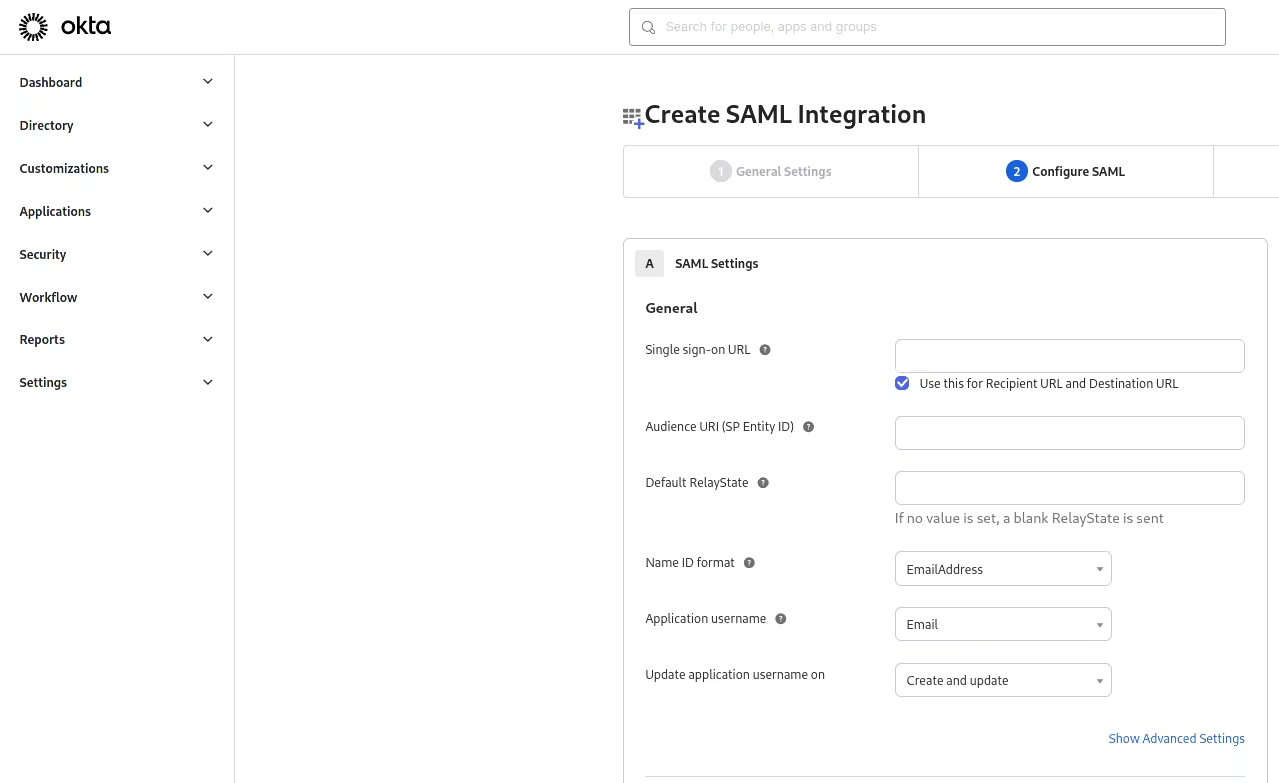
- On the Configure SAML tab, copy paste the SAML Endpoint URL of Callgoose SQIBS(ACS URL) from Callgoose SQIBS in the field of both Single sign on URL field and Audience URI (SP Entity ID) .
- Choose the Name ID format as EmailAddress and Application username as Email
- Click Next
- Select I'm a software vendor. I'd like to integrate my app with Okta. and Click Finish.
- After you create your integration instance in the Create your integration in Okta section, the main settings page appears for your new integration in the Admin Console. Specify General Settings and Sign On options

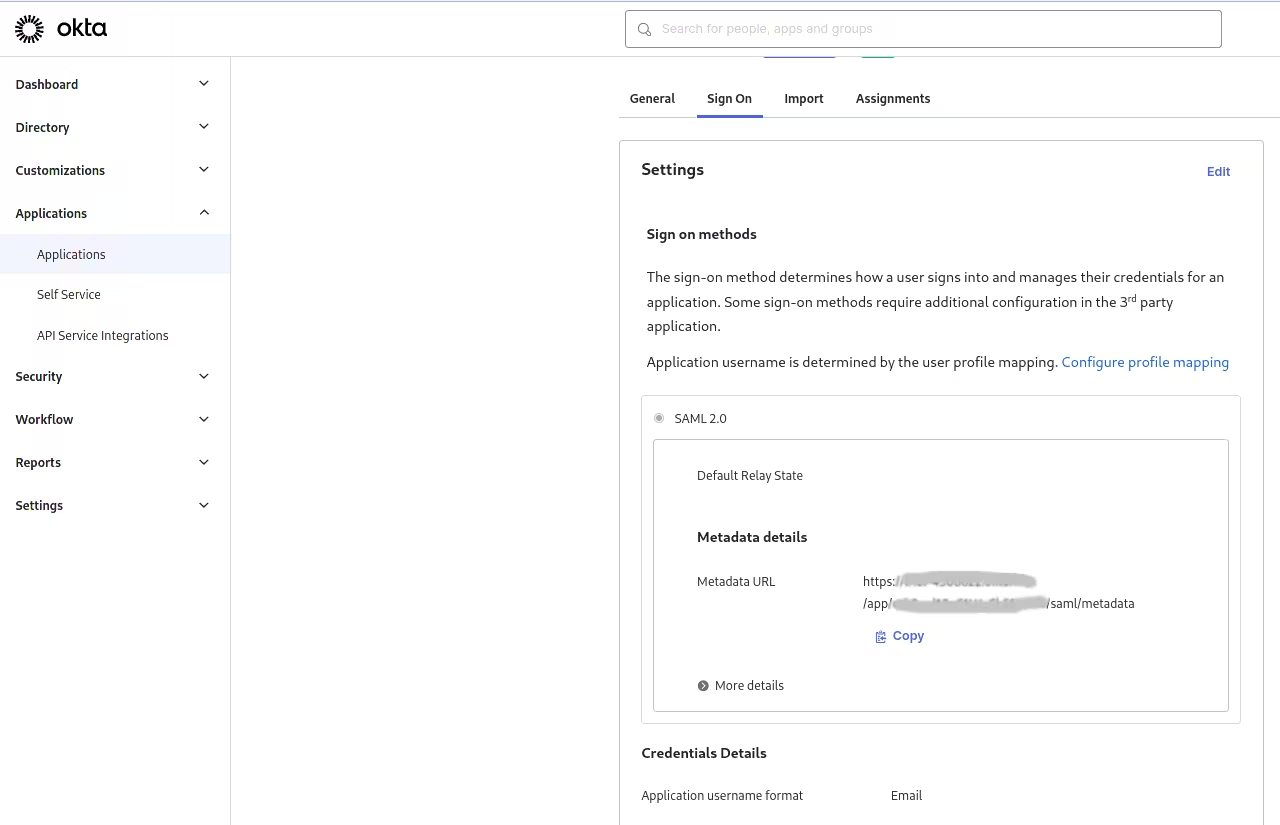
On the Sign On tab, you can copy the Identity Provider metadata for your integration.
3. Configure SQIBS using SSO provider(IdP) values
- In SQIBS, Paste the Metadata URL in Load data from meta data url field of SSO - Idp Details section, and click the Get IdP Details button.
- This will automatically fill in the fields of Issuer URL (Entity Id of Idp), Login URL (SAML 2.0 EndPoint URL of your IdP), Name Id Email Format, and X.509 certificate.
- Enter Organization domain.
- If you want to use Callgoose password login as well, check Allow Callgoose login checkbox.
- Click the SAVE CHANGES button to save.
Once the values have been added, you can use Okta for logging into your SQIBS account during subsequent logins.
When you enter your email on the sign-in page and click the SSO login button, it will automatically redirect you to Okta.

