Integrations
Nagios
This document shows you how you can integrate Callgoose SQIBS with Nagios.
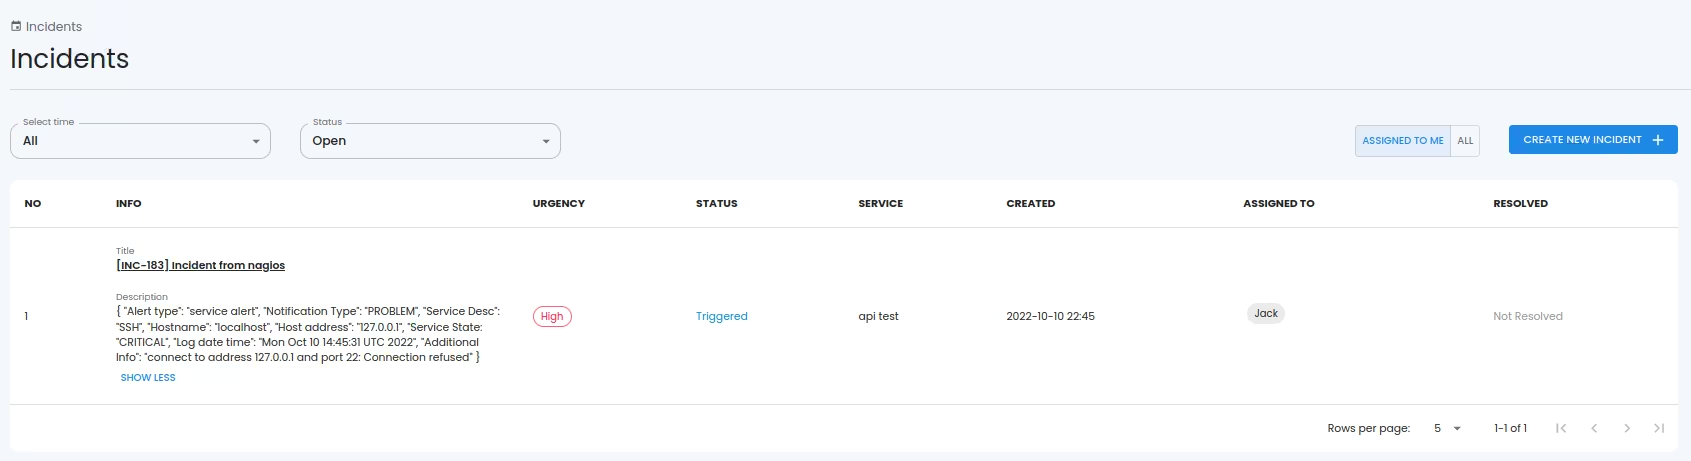
Incidents will be creating in Callgoose SQIBS when there is a incident created in Nagios as per the Alert rule configured by you in the Nagios
In Callgoose SQIBS
Create filter as per the Nagios workflows.
- For test purpose, create an API filter like this
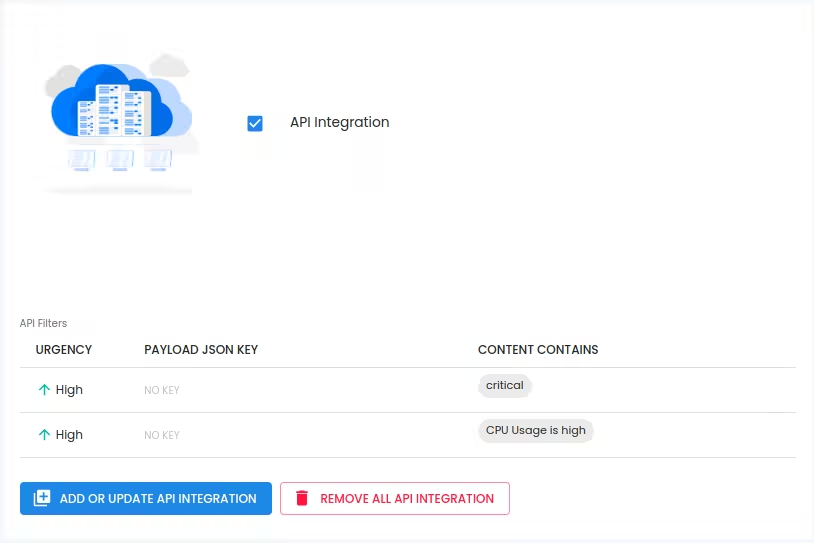
After test, create suitable API filter values depending on the payload sent by Nagios to create a meaningful incident.
In Nagios
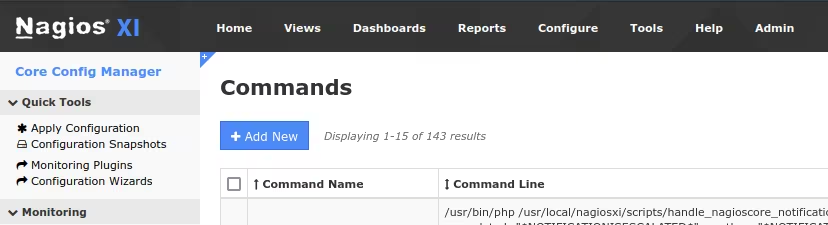
1. Log in to the Nagios XI Dashboard
Click on Configure. Choose Core Config Manager
Click on Commands

2. Click on Add New to create service alert
Fill the following
Command Management
Command Name: notify-service-alert
Command Line:
/usr/bin/curl --location --request POST 'https://xxxxxxxx.callgoose.com/sqibs-api/v1/process?from=nagios&token=xxxxxxxxxxxxxxxxxxxxxxx' --header 'Content-Type: application/json' --data-raw
'{
  "Alert type": "service alert",
  "Notification Type": "$NOTIFICATIONTYPE$",
  "Service Desc": "$SERVICEDESC$",
  "Hostname": "$HOSTNAME$",
  "Host address": "$HOSTADDRESS$",
  "Service State: "$SERVICESTATE$",
  "Log date time": "$LONGDATETIME$",
  "Additional Info": "$SERVICEOUTPUT$"
  }'
1. Must add header Content-Type in Json format
2. How to get endpoint URL
3. Refer this link for How to send to Sqibs API
4. Please make sure you have added API filter contains values in Callgoose SQIBS before you send test notifications to create the incident in Callgoose SQIBS. You may also add API filter after checking API Log
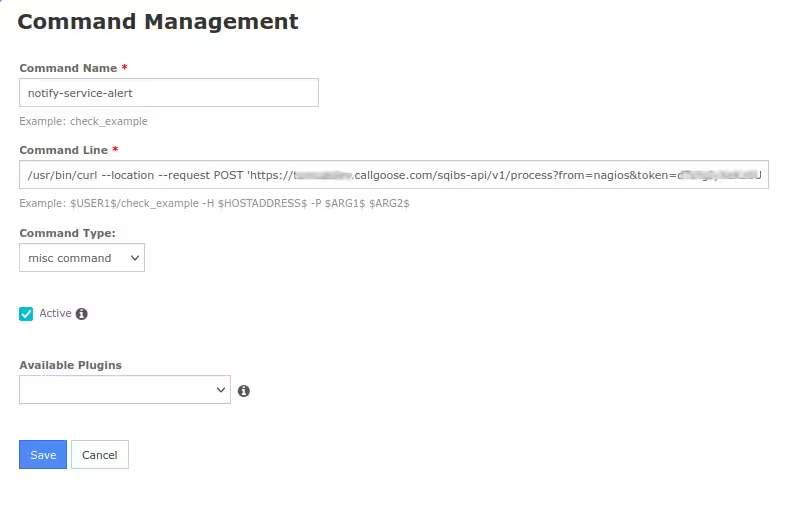
Command Type: misc command
Click on Save
3. Click on Add New again to create host alert
Fill the following
Command Management
Command Name: notify-host-alert
Command Line:
/usr/bin/curl --location --request POST 'https://xxxxxxxx.callgoose.com/sqibs-api/v1/process?from=nagios&token=xxxxxxxxxxxxxxxxxxxxxxx' --header 'Content-Type: application/json' --data-raw
'{
  "Alert type": "host alert",
  "Notification Type": "$NOTIFICATIONTYPE$",
  "Hostname": "$HOSTNAME$",
  "Host address": "$HOSTADDRESS$",
  "Host State: "$HOSTSTATE$",
  "Log date time": "$LONGDATETIME$",
  "Additional Info": "$HOSTOUTPUT$"
  }'
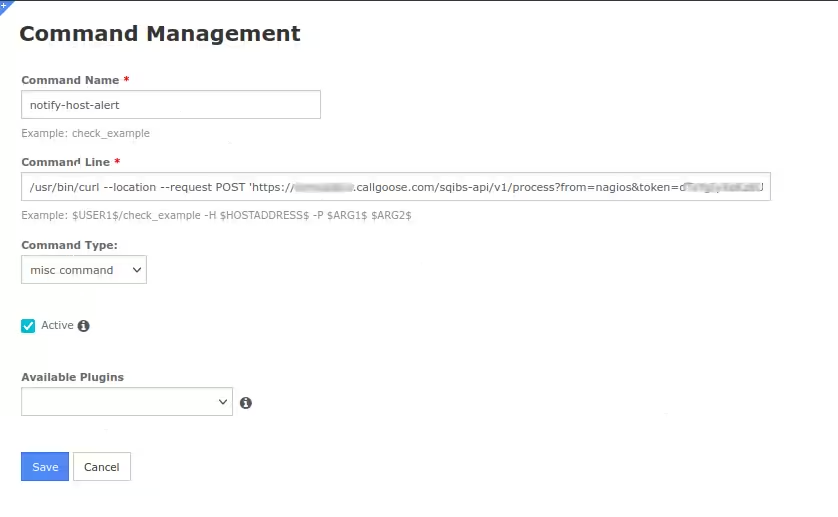
Command Type: misc command
Click on Save
Click on Apply configuration
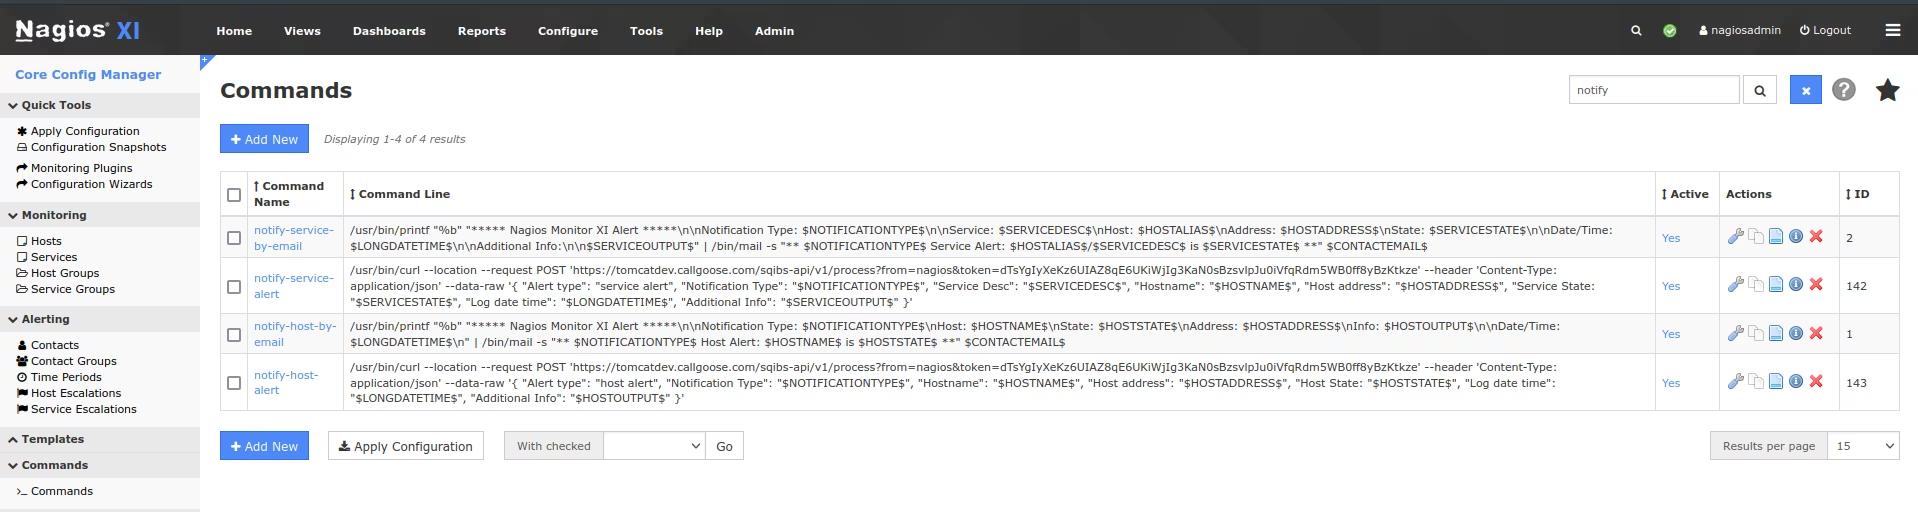
4. Search the word notify in the search icon in the Commands page
You will see the Command Name created for service alert and host alert
5. Click on Contacts under Alerting in the left side navigation pane

You must configure your contacts to receive the host and service notification commands.
Click on Add New
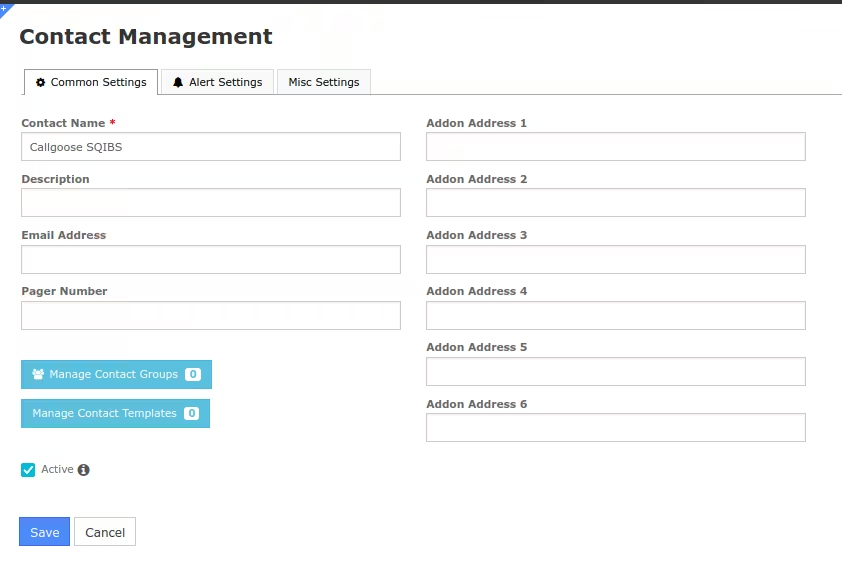
Contact Management
Contact Name: Callgoose SQIBS
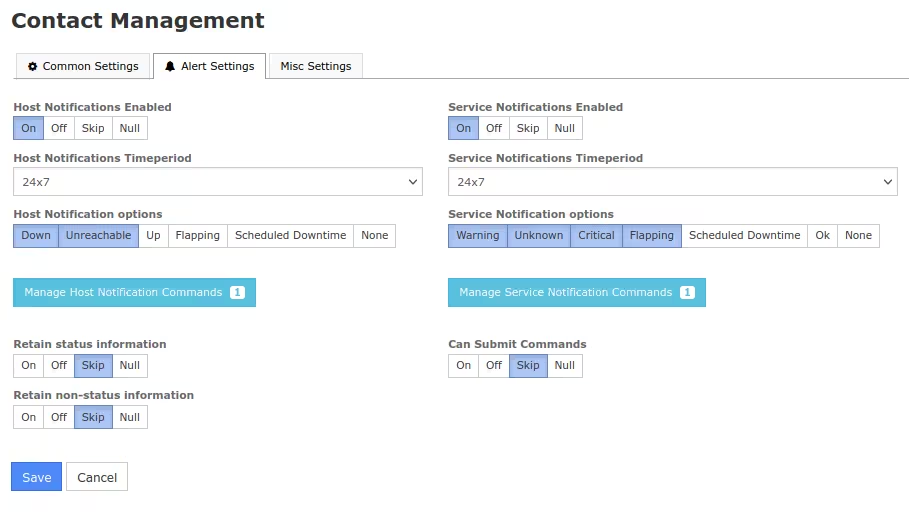
Click on Alert Setting tab
Host Notification Enable: On
Host Notification Timeperiod: 24x7
Host Notification options: Down, Unreachable
Manage Host Notification Commands
Select the notify-host-alert command and Click on Add Selected
Make sure that notify-host-alert moves to the Assigned column
Close the window
Service Notifications Enabled On
Service Notifications Timeperiod: 24x7
Service Notification options: Warning, Unknown, Critical, Flapping
Manage Service Notification Commands
Select the notify-service-alert command and Click on Add Selected
Make sure that notify-service-alert moves to the Assigned column
Close the window
Click on Save
Click on Apply Configuration
6. You will see Callgoose SQIBS in the Contacts
You can call this contact Callgoose SQIBS when you create Notifications

7. How to add these contact “Callgoose SQIBS” to Notifications
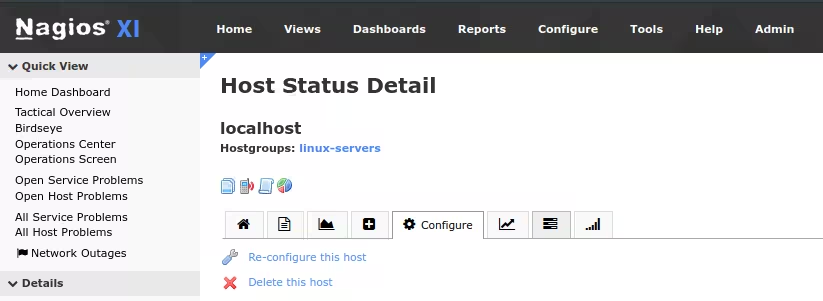
Click on Host Status

8. Click on the host you want to add it in the Notification contact Callgoose SQIBS
Click on Configure
Click on Re-configure this host
Click on the Notifications
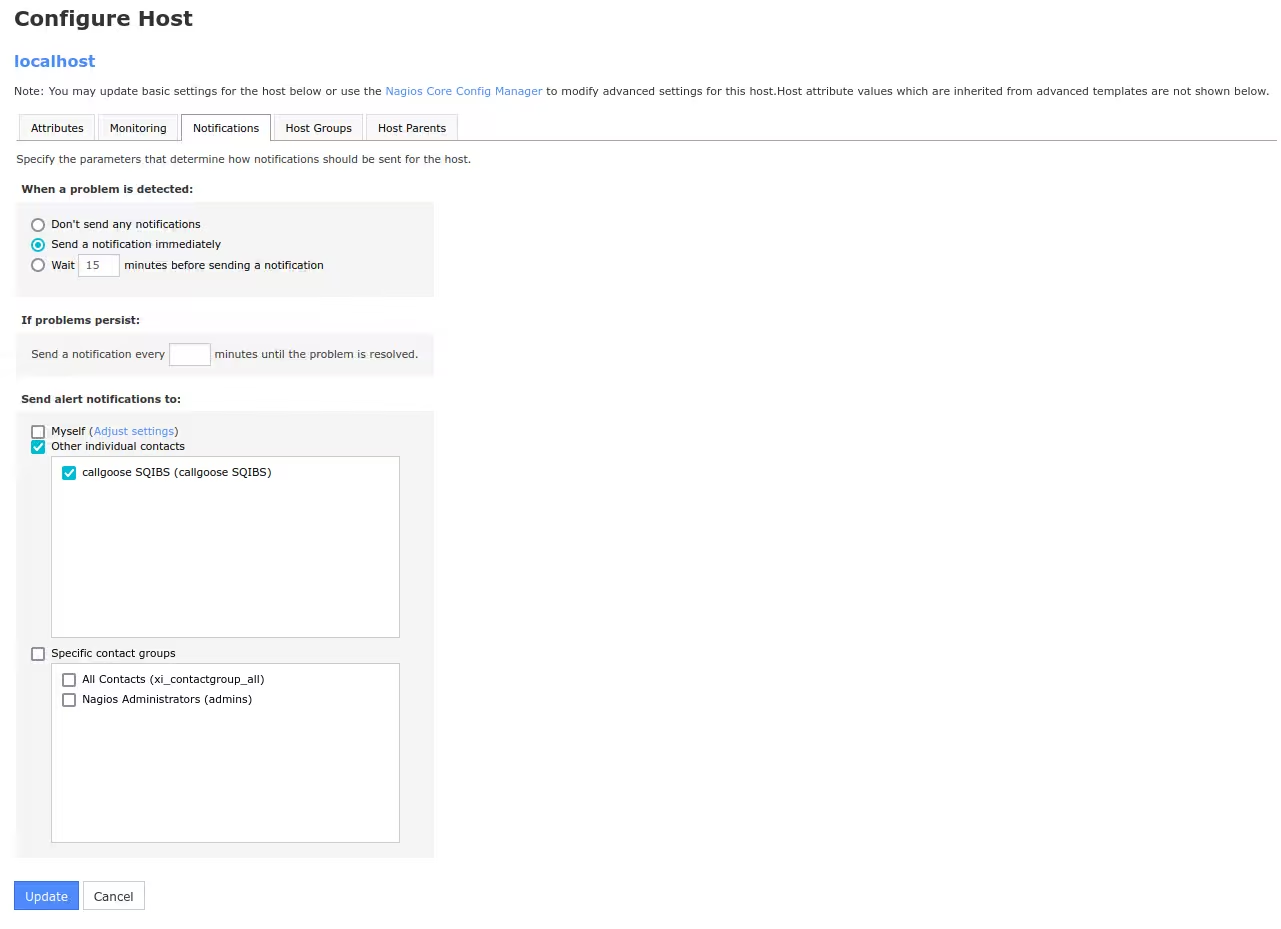
Choose your desired monitoring and alert notification
Send alert notification to: Choose Callgoose SQIBS
Click on Update
You can see the message Configuration applied successfully
You can do the Notifications update for services too.
9. Click on Service Status
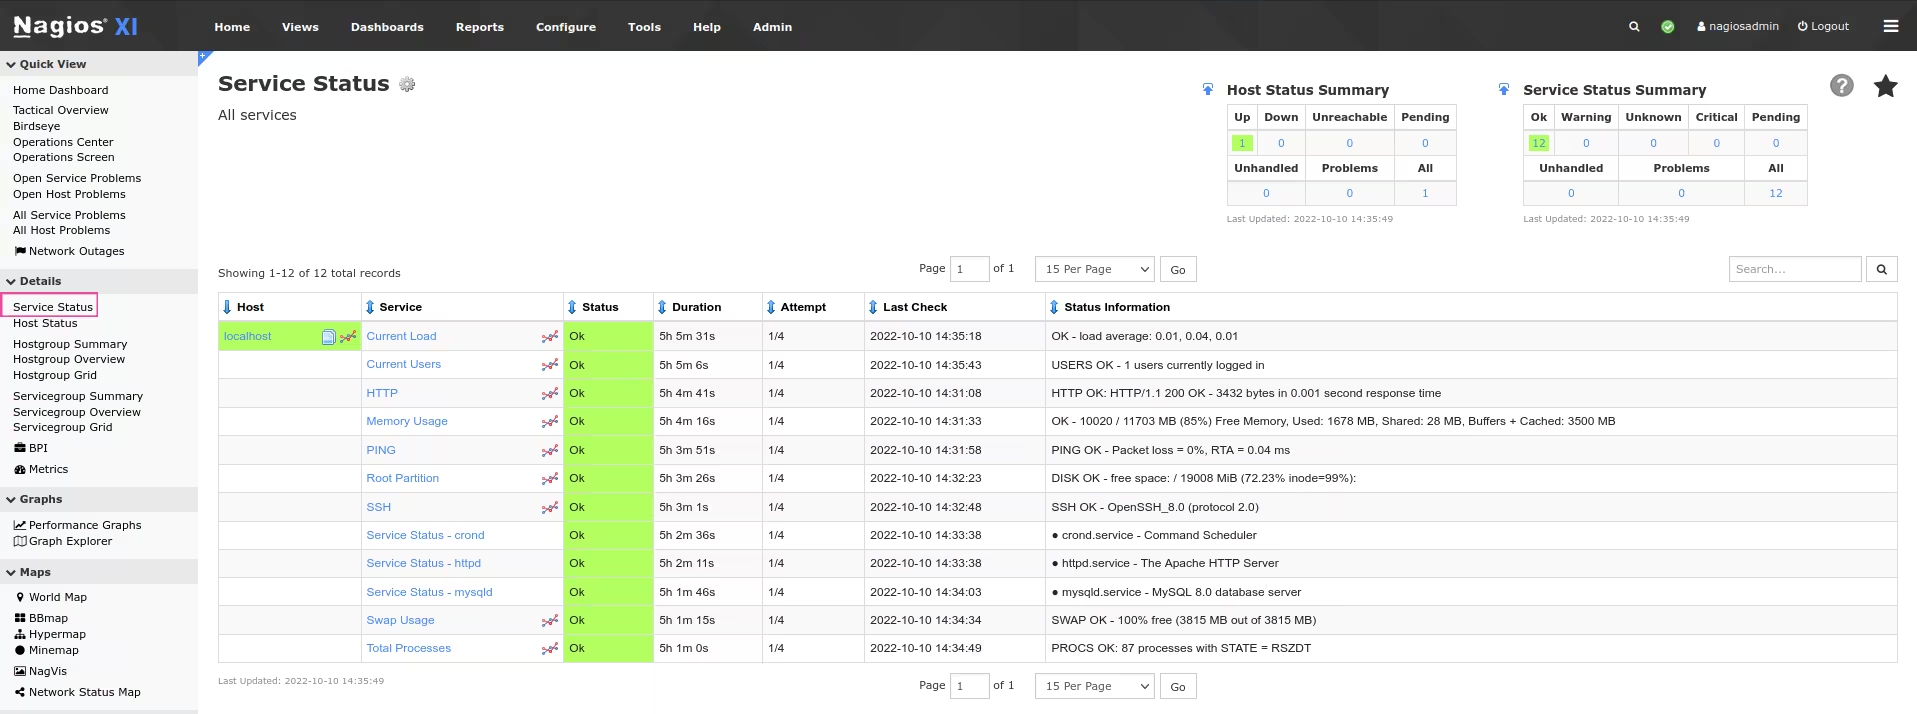
Click on the Service you want to add it in the contact Callgoose SQIBS
Here i chose SSH service to test
Click on SSH service
Click on Configure
Click on Re-configure this service
Click on Notifications
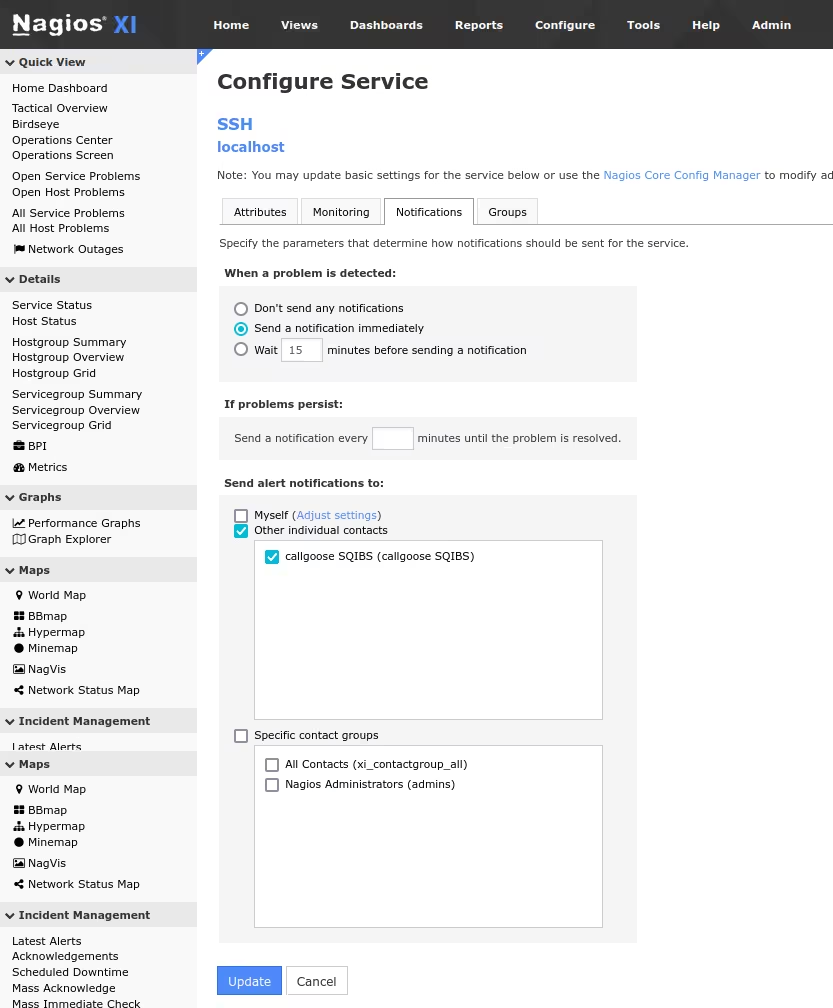
Choose your desired monitoring and alert notification
Send alert notification to: Choose Callgoose SQIBS
Click on Update
You can see the message Configuration applied successfully
Click on Continue
10. Go to Report
Click on Notifications
Top right side corner - You can see All notifications , If not choose All notifications from drop down
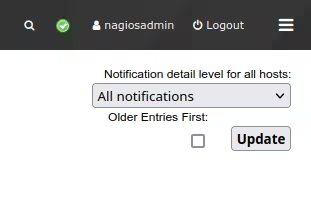
Click on Update
11. How to test
Login to the server you are monitoring the SSH service in Nagios and had added Notification Contact to Callgoose SQIBS
stop the SSH service
You will get Incident notifications in Callgoose SQIBS
You also can see the Notification in Nagios

Whenever Nagios trigger alert, Callgoose SQIBS will create incident as per the conditions you configured in the Nagios and Callgoose API filter.
